- No Products In The Cart
- start shopping
🔌 How to Wire Your 19mm Push Button Switch
Welcome! This guide explains how to wire our 19mm metal push button switches — available in Momentary and Latching versions. Whether you’re working on a vehicle, DIY project, or control panel, follow the steps below for correct setup.
🧭 Terminal Pin Explanation
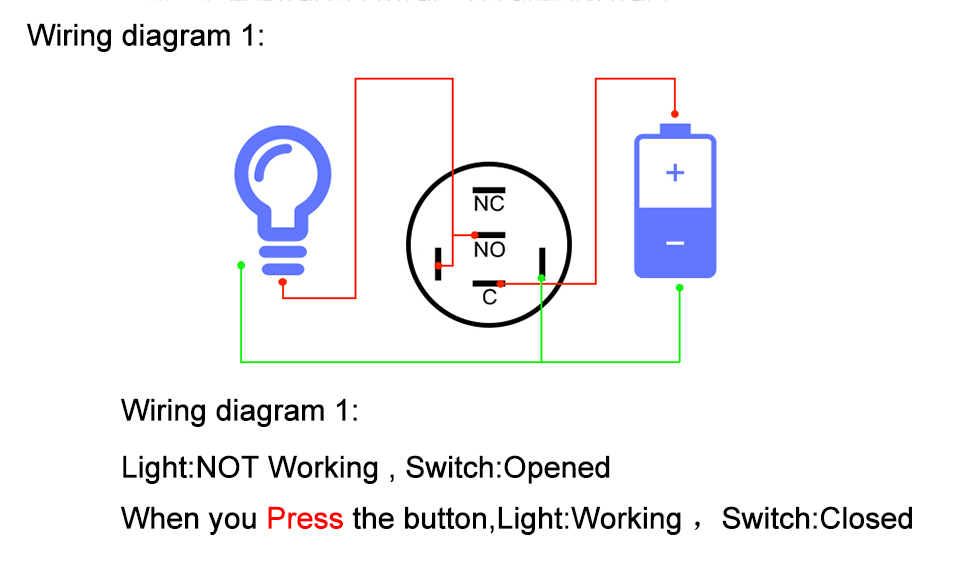
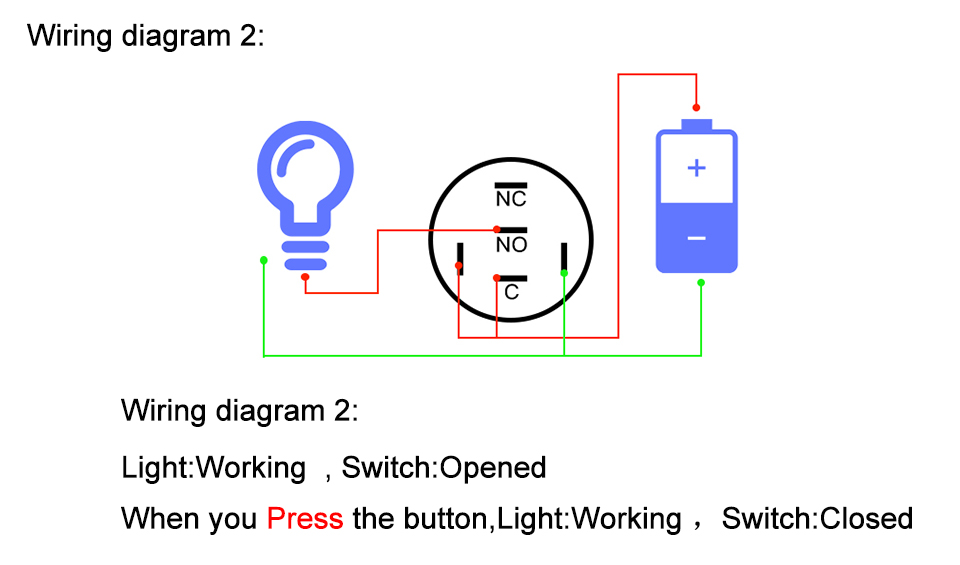
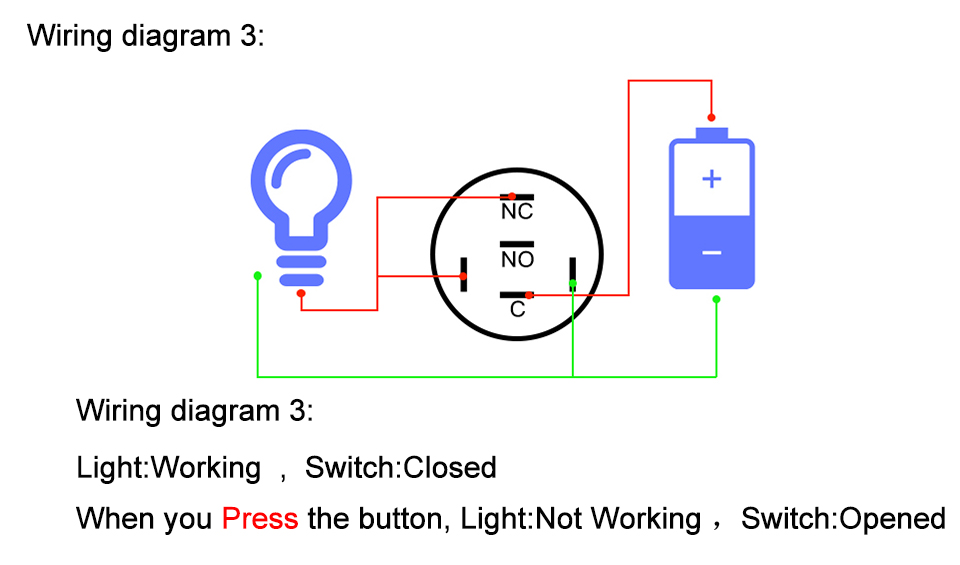
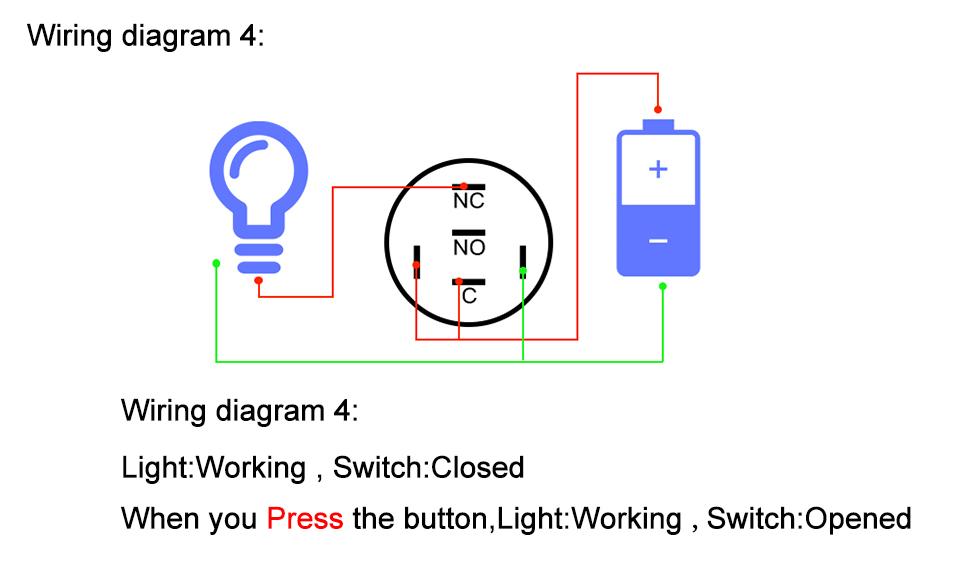
- NO (Normally Open): Circuit is open until button is pressed.
- NC (Normally Closed): Circuit is closed until button is pressed.
- C (Common): Main connection point for switch power or ground.
- + (LED Positive): Connect to your 12V/24V power supply.
- – (LED Negative): Connect to ground or negative terminal.
📸 Wiring Diagrams
Below are the detailed diagrams for various switch types. Click on any image to view it full size:
💡 Quick Tips
- Check LED voltage: 12V or 24V before connecting.
- Use 4.8mm crimp terminals for clean installation.
- Momentary switches return automatically; latching stay pressed.
- Always test polarity before applying power.
📞 Still Need Help?
If you have questions or need help choosing the right connection, please contact us here. We’re happy to assist!